How is the OPGW Cable Installation Process Carried Out?
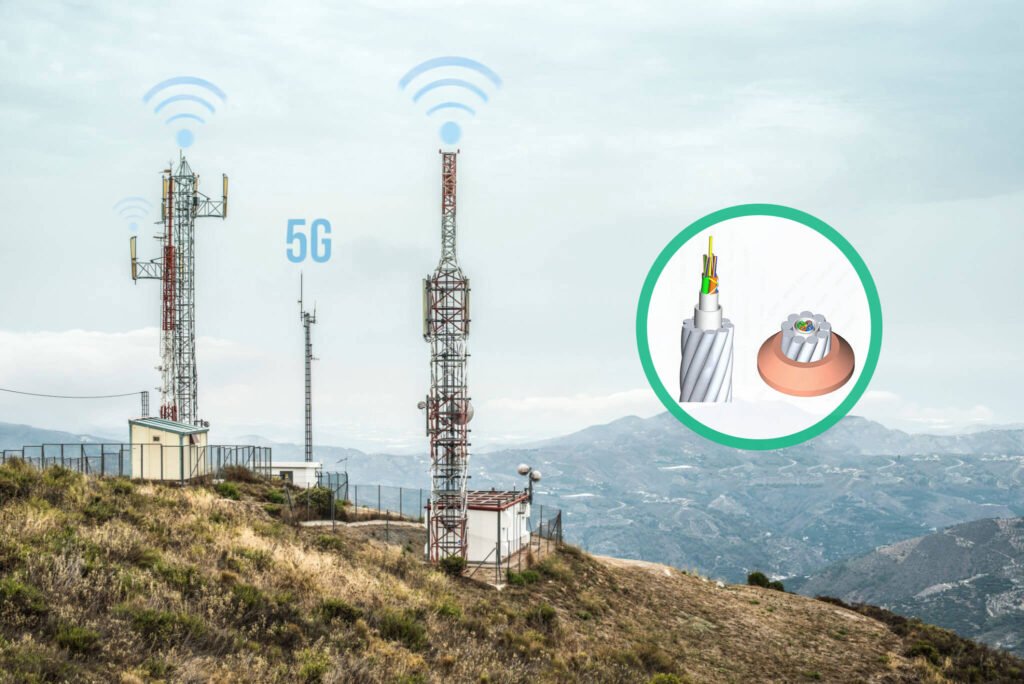
I have spent many years in the telecommunications industry. I have seen projects go from plans to successful implementations. I have learned that careful installation of Optical Ground Wire (OPGW)1 cables is key to a reliable network. I share my experience step by step.
The OPGW cable installation process2 involves careful preparation, precise laying and stringing, installation of necessary hardware, and thorough testing. I have seen that following these steps makes the installation work well and ensures high performance and reliability.
I once worked on a project where every minute of downtime meant lost revenue. I learned that meticulous planning and careful installation bring smooth operations. Imagine a world where seamless communication bridges the gap between distant lands. This vision becomes a reality through the detailed installation of OPGW cables, which combine grounding capabilities with optical fiber technology3. Let me show you the process I follow to ensure these cables perform at their best.
What is involved in the preparation and planning for OPGW installation?
Before starting an OPGW installation project, I always begin with thorough preparation and planning. This stage sets the foundation for the entire process. I make sure that every tool and every team member is ready to work.
Preparation and planning for OPGW installation involve gathering essential tools, inspecting the installation site, and ensuring trained personnel are ready. I have found that these steps are crucial to prevent delays and guarantee a successful installation.
Tools and Equipment
I check my inventory and ensure that all necessary tools are available. Tools such as cable grippers4, tensioners, and pulleys are vital. They help me keep the cable at the right tension and position during installation.
Essential Tools for Installation
| Tool | Function | My Experience |
|---|---|---|
| Cable Grippers | Hold the cable firmly to maintain tension | I use them to avoid any cable slippage |
| Tensioners | Adjust and control the cable’s tightness | They help me keep the tension within limits |
| Pulleys | Guide the cable along the required route | Ensure smooth movement during stringing |
| Winches | Assist in pulling the cable over distances | Crucial for long-span installations |
I always double-check my tools before the team starts the work. This check avoids unexpected problems.
Site Inspection
I personally inspect the site before installation. A good site inspection is very important. I look at the structural firmness, the layout of towers, and the overall path for the cable. I also check the width and length of the crossing frame and ensure that traction and tension sites are well arranged.
Key Site Inspection Points
| Inspection Point | What to Check | My Notes |
|---|---|---|
| Structural Firmness | Check the stability of towers | Look for any damage or wear |
| Cable Path | Measure the length and width of the crossing | Ensure the route is clear |
| Traction & Tension Sites | Verify that points are correctly positioned | Confirm they meet design requirements |
| Environmental Conditions | Note weather and terrain factors | Essential for planning installation |
I use these checklists to guide my team and ensure every detail is correct.
Staff Training
I have learned that even the best tools and plans can fall short without proper staff training. I ensure that everyone on the team is well-trained. I conduct briefings to explain the installation steps. Good communication along the installation line is vital for a smooth operation.
Training Focus Areas
| Training Area | Focus | My Recommendation |
|---|---|---|
| Equipment Use | How to handle tools like grippers and tensioners | Regular practice sessions |
| Safety Procedures | Steps to avoid accidents during installation | Follow simple, clear safety rules |
| Communication | Coordination between team members | Use radios and hand signals for clarity |
| Problem Solving | What to do in case of unexpected issues | Run drills and mock scenarios |
I always make sure that my team feels confident before we start. This preparation saves time and prevents errors.
How are OPGW cables laid and strung?
I have spent many days in the field laying and stringing cables. This part of the process requires precision and control. I must adjust the cable tension and speed to match technical specifications. Even a small mistake here can affect the performance of the network.
OPGW cable laying and stringing involve controlling tension within specified limits and managing traction speed. I have seen that keeping the cable neither overloaded nor under-tensioned is essential to prevent damage.
Tension Control
I always monitor the tension closely. The cable tension should be less than 10% of the Rated Tensile Strength (RTS)5. It should not exceed 20% RTS. I use cable grippers and tensioners to keep the tension in the right range.
Tension Control Guidelines
| Parameter | Limit | My Practice |
|---|---|---|
| Minimum Tension | Below 10% of RTS | Maintain a safety margin |
| Maximum Tension | Not to exceed 20% of RTS | Adjust using calibrated tensioners |
| Monitoring Frequency | Continuous during stringing | Regular checks with digital tools |
| Response Actions | Slow down or adjust if tension deviates | Immediate correction to avoid damage |
I keep this table visible on-site. It helps everyone stay aware of the limits.
Traction Speed
I control the speed at which the cable is pulled. I start slowly at 5m/min. As the cable reaches the first base tower, I increase the speed gradually to 30m/min. I ensure the speed never exceeds 40m/min. This careful control prevents the cable from being damaged.
Traction Speed Guidelines
| Stage | Speed Range | My Observations |
|---|---|---|
| Start of Installation | 5 m/min | Start slow for a smooth beginning |
| Approaching First Tower | Gradually up to 30 m/min | Increase speed as confidence builds |
| Maximum Limit | Not more than 40 m/min | Ensure not to overspeed the process |
| Adjustments | Based on real-time feedback | Always adjust based on cable behavior |
I use these guidelines to ensure the cable is laid without strain.
I add more details on the process to cover every aspect of the installation. My goal is to leave no question unanswered.
Hardware Installation
Once the cable is in place, I install the necessary hardware. This includes brackets, clamps, and grounding devices. I check that every piece fits well and is securely fastened. My experience tells me that good hardware installation is as important as the cable laying itself.
Hardware Components and Functions
| Hardware Component | Function | My Experience |
|---|---|---|
| Brackets | Support the cable along its route | Prevent cable sagging |
| Clamps | Secure the cable in place | Essential for stable installation |
| Grounding Devices | Ensure proper electrical grounding | Protect the system from surges |
| Protective Covers | Shield hardware from environmental damage | Increase longevity of installation |
I inspect each hardware piece before and after installation. This check is critical for long-term reliability.
Final Testing
After installation, I perform thorough testing. I test both the grounding function and the data transmission capability. I use specialized equipment to check that the cable meets all specifications. Testing is not just a step—it is a guarantee of performance.
Testing Procedures
| Test Type | Purpose | My Checklist |
|---|---|---|
| Grounding Test | Verify electrical fault protection | Confirm continuity and resistance levels |
| Data Transmission Test | Ensure high-speed communication | Check signal strength and error rates |
| Tension Verification | Confirm that tension is within safe limits | Re-check using digital tension meters |
| Visual Inspection | Look for any physical damage or misalignment | Use cameras and manual inspection |
I document all tests and share the results with my team. This documentation is essential for future reference.
Conclusion
The installation of OPGW cables is a meticulous process that involves several critical steps, each playing a vital role in ensuring the cable’s performance and longevity. From preparation and planning to cable laying, hardware installation, and final testing, I have learned that every phase requires precision and expertise. By following these detailed steps, I have overcome the challenges of OPGW installation, resulting in robust and reliable telecommunications infrastructure. This process not only empowers engineers like me but also ensures that the infrastructure supports seamless communication across vast distances, ultimately bridging the gap in our interconnected world.
Optical Ground Wire (OPGW) cables are dual-function cables that serve as both grounding wires for towers and fiber optic communication channels, crucial for modern telecom infrastructure. ↩
Understanding the OPGW cable installation process is vital for telecom engineers, as it details each stage, ensuring successful implementation and optimal cable performance. ↩
Optical fiber technology is central to telecommunications, offering high-speed data transfer capabilities essential for modern communication needs. ↩
Cable grippers are critical tools used for maintaining appropriate tension and position of cables during the installation process. ↩
Rated Tensile Strength (RTS) is a measure of the maximum tension cables can withstand and is a vital parameter in planning OPGW installations. ↩
Talk to ABPTEL
Looking for the right optical hardware for your AI data center, GPU cluster, or FTTA project? ABPTEL ships from Shenzhen with OEM/ODM support, fast lead times, and engineering-level pre-sales advice.
- 🔥 400G & 800G OSFP / QSFP-DD Transceivers — for AI training fabrics and hyperscale spine-leaf
- 📡 MPO / MTP High-Density Cabling — 12 / 24 / 32-fiber for high-density data centers
- ⚡ AOC & DAC Cables — short-reach GPU interconnects, OEM compatible
- 🧩 SFP / SFP+ / SFP28 / QSFP28 Modules — 1G to 100G optical transceivers
- 📋 Data Center Cabling Solutions — end-to-end design guide
- ❓ Read our FAQ — compatibility, polarity, lead time, MOQ
💬 Get a quote in 12 hours: Contact Candy · WhatsApp +86 188 1445 5697 · candy@abptel.com