")


Description
🛡️ The Final Boundary: Secure Your Network Demarcation
What is a Fiber NID? The Network Interface Device (NID) is the critical “handshake” point between the Service Provider (ISP) and the Homeowner. It physically and legally separates the rugged outdoor network from the delicate indoor wiring.
Why ABPTEL’s NID? Most NIDs are one-trick ponies. Ours is a Universal Platform. Whether you need simple splicing, an LGX patch panel, or a housing for a micro ONT, this single enclosure adapts to your deployment style.
🛠️ One Box. Three Configurations.
1. Splice Mode (Standard)
Perfect for simple drop termination. Includes a flip-up splice tray for up to 2 fusion splices and a parking lot for SC/APC adapters.
Best for: Traditional FTTH Drops.
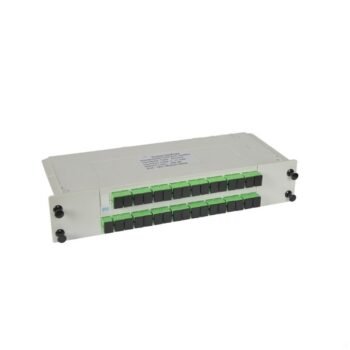
2. LGX Mode (Modular)
Features a standard LGX bracket slot. Pop in a pre-terminated LGX Cassette or a 1×4 Splitter Module for modular connectivity.
Best for: Plug-and-Play deployments.
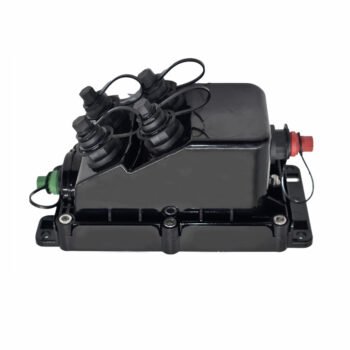
3. ONT Housing (Active)
Spacious internal layout (216x150mm usable area) allows mounting of small Micro ONTs (like Ubiquiti/Nokia) directly inside the box for weather protection.
Best for: Integrated Access.
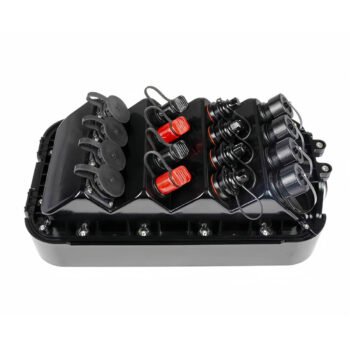
🔍 Inside the Box: The 4-Zone Architecture
Unlike cheap generic boxes that are just empty shells, the ABPTEL NID features a meticulously designed 4-Zone Fiber Management System to ensure bend-radius protection and separation of circuits.
Zone A: Feeder Entry & Grounding
Located at the bottom left. Features a tiered rubber grommet (supports 3mm-16mm cable) and a Brass Grounding Lug. This is where you ground the toneable drop wire to protect the home from lightning surges.
Zone B: The “Flip” Splice Tray
A hinged splice tray that flips up 90 degrees. This allows you to work on the “provider side” splicing underneath, while keeping the “customer side” patching separated on top. Supports 2x 60mm splice sleeves.
Zone C: Adapter Parking Lot
The middle panel holds up to 2x SC Simplex or 2x LC Duplex adapters. It acts as the physical demarcation line. ISP plugs in the left; Homeowner plugs in the right.
Zone D: Slack Storage
Behind the tray, there is dedicated spooling space to store up to 50ft (15m) of excess fiber buffer. Essential for future re-splicing or maintenance without re-running cable.
🛡️ Not All Plastics Are Created Equal
Many competitors use standard recycled ABS plastic, which becomes brittle and yellow after 2 years of UV exposure. ABPTEL uses a premium PC+ABS Alloy (Polycarbonate blend).
| Feature | Standard NID (Competitors) | ABPTEL NID Series |
|---|---|---|
| Material | Standard ABS | PC + ABS + UV Stabilizers |
| Impact Resistance | Cracks under hammer test | IK10 Rated (Vandal Proof) |
| Lifespan | 3-5 Years | 20+ Years (Outdoor) |
📊 Technical Specifications
| Dimensions (H x W x D) | 251mm x 261mm x 75mm (Compact Profile) |
| Material | UV-Stabilized PC+ABS (Industrial Grade) |
| Ingress Protection | IP65 (Dust Tight + Water Jets) |
| Capacity | 2x SC Simplex / 2x LC Duplex / 1x LGX Module |
| Cable Entry | 3 Ports (Supports 1-inch conduit, flat drop, or round cable up to 16mm) |
| Grounding | Integrated Copper Grounding Lug (for Toneable Drops) |
| Security | Tamper-proof Hex Screw (Key included) + Padlock Hasp |
🔧 Field Installation Guide (Step-by-Step)
Step 1: Mounting
Use the 3 rear mounting holes to secure the box to the wall. For siding, use the included spacers to ensure the door can swing open fully.
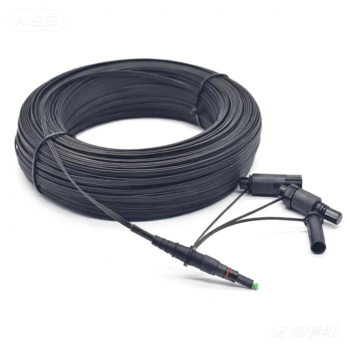
Step 2: Cable Entry
Pierce the bottom rubber grommet. Feed the outdoor drop cable through. Secure the cable jacket using the internal metal hose clamp (included) to prevent pull-out.
Step 3: Grounding (Critical)
Strip the toneable copper wire from the drop cable. Wrap it around the internal Brass Grounding Lug and tighten. Connect a #6 AWG ground wire from the lug to the house earth rod.
Step 4: Splicing
Strip the fiber buffer, cleave, and splice to the pigtail. Shrink the splice sleeve and snap it into the splice chip on the flip tray.
Step 5: Sealing
Close the NID. Use the hex key to lock the tamper-proof screw. Apply a small bead of RTV silicone around the top and side edges if the wall surface is uneven.
- 1x NID Enclosure (Grey)
- 1x Flip Splice Tray (Integrated)
- 1x Wall Mounting Kit (3x Screws, 3x Anchors)
- 2x Splice Protection Sleeves (60mm)
- 1x Security Hex Key
- 4x Nylon Zip Ties
- 1x Internal Grounding Wire Guide
ISP Field Guide: NID Installation Best Practices
1. Where to mount?
Always mount the NID on the side of the house closest to the utility pole or underground conduit. Ensure it is 3-5 feet off the ground for technician accessibility.
2. Grounding is Mandatory
If using Toneable Drop Cable, you MUST strip the copper tone wire and connect it to the NID’s internal ground lug. This directs lightning surges to the earth ground, protecting the customer’s equipment.
3. Sealing the Entry
Use the included rubber grommets for cable entry. For the exit hole going into the house, always apply silicone sealant to prevent bugs and moisture from entering the wall cavity.